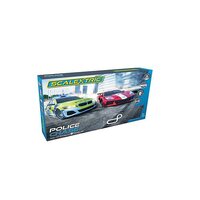
Slot Cars
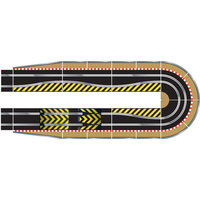
Scalextric Track Maintenance
Tip: Cleaning
Cleaning Scalextric track
Light cleaning of the track surface is recommended for daily use. We recommend using a damp cloth or very lightly oiled cloth. This removes light grime and dust from the track surface. Wipe surface dry after using a damp cloth.
As matter of good practice, always do this before using the Scalextric layout as this will help ensure you get the best grip from the car tyres.
Corrosion and heavy tarnishing
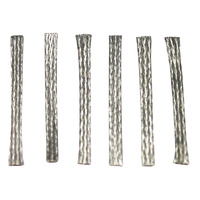
Use a mild abrasive material to shine up the running surfaces of the pick-up rails, making sure that the male and female connections at the ends of the track sections are also bright and shiny. Be aware that sometimes no amount of cleaning of heavily corroded rails and connectors will return the track to a useable state and replacement of track in this condition is the only alternative.
Tip: Power Drops and Breaks
There are power breaks or weak power sections on the Scalextric layout. How can this be repaired?
When a car stops on a circuit this can indicate TWO breaks in electrical continuity since electricity travels in both directions around the track. If there was only one break then you would not notice it as electricity flows in both directions!
The way to correct this problem is to:
-
- Disconnect the track behind the power base.
- Then drive a car forward at a slow speed. When the car crosses from one piece of track to the next there should not be a drop in power/speed.
- If there is a drop or loss in power, then fix the track connection. Disconnect both track pieces (the track piece immediately before and after the fault). Turn them over on a hard surface. Ensure that the metal rail tabs at the ends of the rails (there are 8 of them on every track piece) are fully pressed and clamped down to the plastic. Use a stout screwdriver or similar to push them tight.
- Reconnect the repaired track pieces and retest by placing the car back at the powerbase and again drive the car slowly forward until you meet the next reduced or lost power section.
- Continue the above repair process until you get to the last track piece before the powerbase.
- Reconnect the last track piece to the powerbase.
- Full power should now be restored.
Tip: Testing Lane Change Sections
In the event that a lane change track piece fails to operate follow this simple procedure:
- Disconnect the lane change track piece and check that the rail connections are all good.
- Check that there are no obstructions in the slot preventing the flipper from physically moving. It should 'flip' freely.
- Ensure that the track piece hasn't been bent (stood on, for instance) which will also cause the flipper to jam.
- Reconnect the track piece and turn power on.
- Manually move the flipper into the position which would cause the car to change lane. Manually push a car over the track lane change sensor (this is a round hole about one car length before the flipper). The flipper should flip back to the 'straight ahead' position.
- If the above procedure has not identified any problems, please contact our Customer Care team for further assistance.
Tip: Fixing Track to a Baseboard
Ideally, it is best not to nail, screw or glue the track to a baseboard at all. The reason for this is that plastic and metal, the two ingredients of Scalextric track, expand and contract at different rates. So, on hot days the plastic will expand larger than the rail. Of course, the rail won't let the plastic expand evenly due to the rail gripping the plastic. This causes the track surface to warp.
When the track is laid loose the circuit can 'grow' and absorb any expansion due to heat. If the track is not allowed to move freely (i.e. nailed down) then any expansion will only lead to uneven surfaces.
If the layout is to lay flat, leave the track loose. Keep the layout in a dry and constant temperature room. This normally means that the loft, shed and garage are not ideal places.